Learn how to make your own outdoor cushions using our step-by-step guide.

What Are Outdoor Cushions?
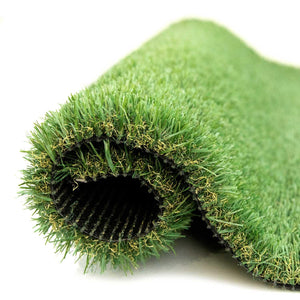
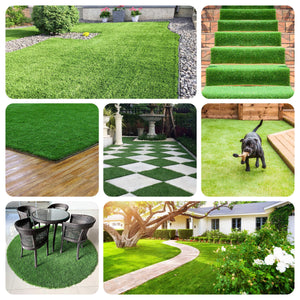
Outdoor cushions are firm, weather-resistant pillows or seat pads that rest atop outdoor furniture seating, like benches, loveseats, outdoor couches, sectionals, and patio chairs, to make them more comfortable for lounging. These cushions are usually made from durable fabric to protect them from sun, rain, and even snow on an outdoor patio.
Making outdoor seat cushions is a simple and fast DIY project that allows DIYers of all levels to update their patio furniture or give their outdoor space a quick makeover on a limited budget.
What Materials Do You Need to Make Outdoor Cushions?
Here is a list of materials that you will need to make DIY outdoor cushions:
- Upholstery fabric: For outdoor cushion covers, choose a heavy-duty fabric that can handle the elements year-round, like canvas twill or another fabric, which fabric stores usually sell under the label “outdoor fabric.”
- Cushion insert or old cushion : If you’re making your furniture cushions from scratch, you’ll need to purchase a comfy cushion insert (usually a thick, layered polyester or outdoor foam) and cut it to size using a saw or fabric shears.
- Sewing machine: A sewing machine will make this sewing project much faster. Using a sewing machine will help you sew four straight, even lines for your cushion and allow you to achieve a professional-quality final result. However, if you don’t have a sewing machine, you can hand sew the cushions.
- Needle and sewing thread: You’ll need a sewing needle and thread to finish the backs of your chair pads, whether or not you’re using a sewing machine. Opt for thread in a color that blends with your fabric.
- Sewing pins: Sewing pins are useful for holding the fabric in place before you sew, helping you achieve straighter lines. You only need a handful of pins for this project.
3 Tips for Making Outdoor Cushions
Here are a few tips to consider before tackling your DIY cushion project:
- Choose the right material . If you don’t have an awning or umbrella to protect your cushions, consider a lighter or fade-resistant fabric to make sun-bleaching less noticeable. If your cushions will be exposed to lots of rainfall, water-resistant fabric is a good choice to prevent mildew, or you can use a waterproof spray to help seal your cushions after you’ve sewn them. If your cushions are for the outdoor dining chairs in your patio set, consider patterned fabric rather than solid colors, which can hide spills and stains better. Many DIYers will buy extra fabric pieces for their outdoor chair cushions to make matching outdoor pillow covers.
- Sew over the old cushion. If you’re making new cushion covers to go over old cushions, you can simply sew your replacement cushions over the tops of the old covers and don’t need to remove the covers to use the filler.
- Sewing zippers. If you choose to sew zippers into your pillows, you’ll need a special zipper foot in addition to your sewing machine’s standard presser foot.
How to Make Outdoor Cushions
Here’s a step-by-step tutorial to help you sew cushions for your outdoor seating and home decor:
-
Plan your design. There are several elements to consider before buying fabric or breaking out the sewing machine. Are you making your patio cushions from scratch or sewing new covers for old cushions? Do you want to sew an entire cushion set, including specialty cushions like bench cushions, couch cushions, chaise lounge cushions, back cushions, throw pillows, or lumbar pillows? Are you adding extra embellishments like a zipper, ties, velcro attachments, or a slipcover opening? What are the ideal dimensions to have your box cushions properly fit on your bench or chair? Sketch out your designs on paper to determine the best size and style. - Cut and pin your fabric. pread out your fabric with the right side facing up, and place your cushion insert or old cushion on top of it. Then, fold the fabric over the top of the cushion to enclose it (the fabric should be wrong-side-out or right-sides-in). Trim the three open sides, so the fabric covers each side of the cushion with a ¼-inch seam allowance, with the seams meeting in the middle of each side. Use sewing pins to pin the sides together, or move the project to the sewing machine and plan to sew with a ¼-inch allowance.
- Sew up the sides. Remove the cushion insert from your fabric. Sew a straight line along the two side seams (the fabric should still be right-sides-in). Reinsert the cushion insert into the inside-out fabric. It should fit nice and snugly—if not, sew new side seams to make the fit tighter.
- Finish the corners. With your cushion insert still inside the fabric, find the two front corners where your fabric hangs over the corner of the cushion insert, and place a pin along the line of the cushion edge to mark the line you’ll sew. Remove the cushion insert and sew along the pins to create clean-looking box corners on your cushion.