Shade Sails Design Tips
Browse through a host of design tips below! These are a mix of sail mechanics and potential design ideas for you to utilize in your space. While installing mounting hardware is the first physical step to be taken, all of the design factors should be taken into account before getting far into your shade sail project.
Plenty of Space
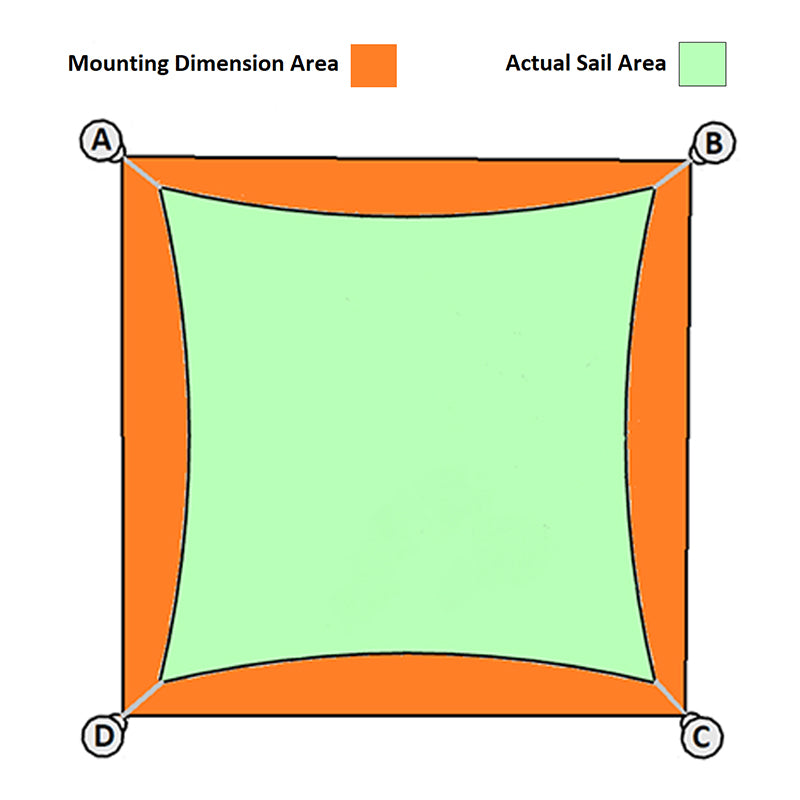
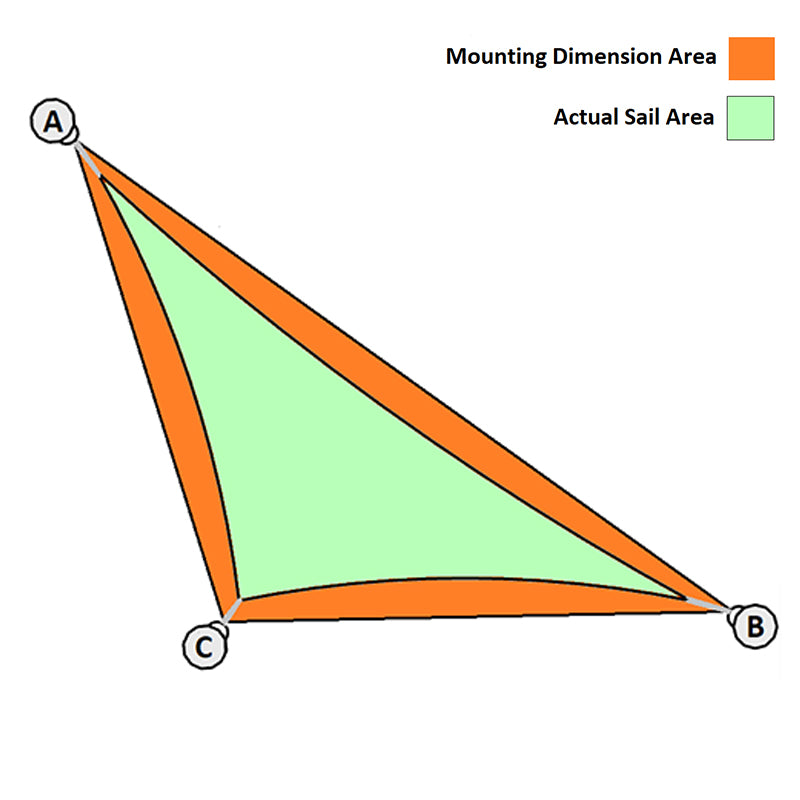
Plan for around 25%more area than you may think you need. The required attachment hardware and arc curvature both can eat away more shade coverage than some people realize. Arc curves are vital to maintain tension throughout the entire area of the sail. Without them, sails will sag and wear out much faster over time!
We also make straight edge sails, please call us if you have special needs.
Measuring Preference
-
Mounting point measurement method
Most customers prefer to provide us with measurements of the space to be filled and have us calculate the final dimensions of the sail. With this preference, we will adjust the sail dimensions to allow for needed hardware and will ship the hardware along with the sail as part of the price. Sails ordered using this option are warrantied to fit if measured according to the instructions provided on this website.
-
Actual size measurement method
This measurement is for those who are sure that this size is a sail definitive size
With this perference, we will fabricate to the dimensions you specify (with reasonable tolerance). Hardware is not included in the pricing and must be ordered separately. Sail will me made to match the measurements you have provided, but we can make no warranty as to whether it will fit your space.
NOTE: These sails are cut to measurements you provide and there will be no percentage removed for stretch or attaching hardware. It is ill-advised to reuse hardware or adjust for hardware on your own. Please purchase fixing/tensioning hardware separately from our hardware page. Sail is not warrantied to fit your space. It will be made the dimension you provide. It will not be adjusted to compensate for any hardware.
For more information, click on the jump to watch our official tutorial!
Attention
TIPS
-

Avoid Narrow Sails
This is the #1 issue that tends to come up with shade sail design. Ideally, a shade sail should not be more than twice as long as it is wide. Both triangles and rectangles get suboptimal when they are outside of that 2:1 length to width ratio.
For triangles, the closer to equilateral (same side lengths), the more optimal the sail will be. Narrow corners tend to make sails much more difficult to tension properly. They are more prone to fluttering in the wind or having wrinkles or distortions at narrow corners. -
Midpoint Attachments
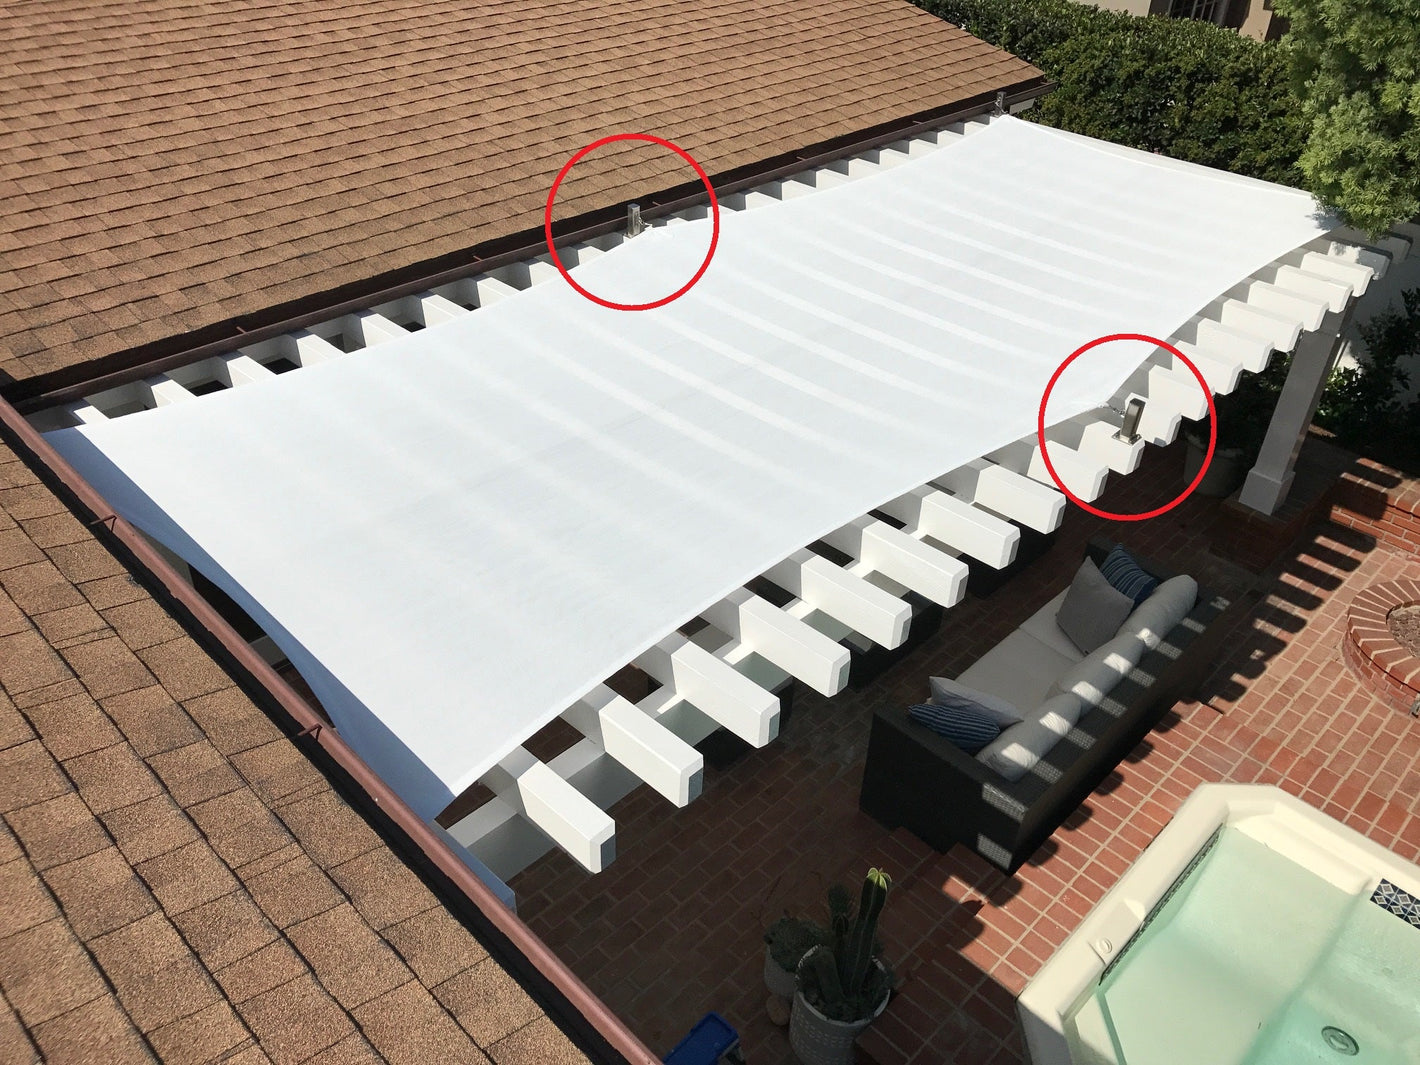
For narrow rectangles, a mid point attachment on a long side can be a great help.
Cable extensions can be used to create a longer attachment setup. This can bring the sail corner inward toward the sail and reduce narrow concerns.
-
Standard Sizes - 4 Shapes
Order OnlineChoose your dimensions, color, hardware package, and immediately order your sail.
-
Custom-made to Fit Your Space
Contact us directly, we have a dedicated design team to solve all your problems!
+ 1 (888) 789-1123
customersupport@shopamgo.com
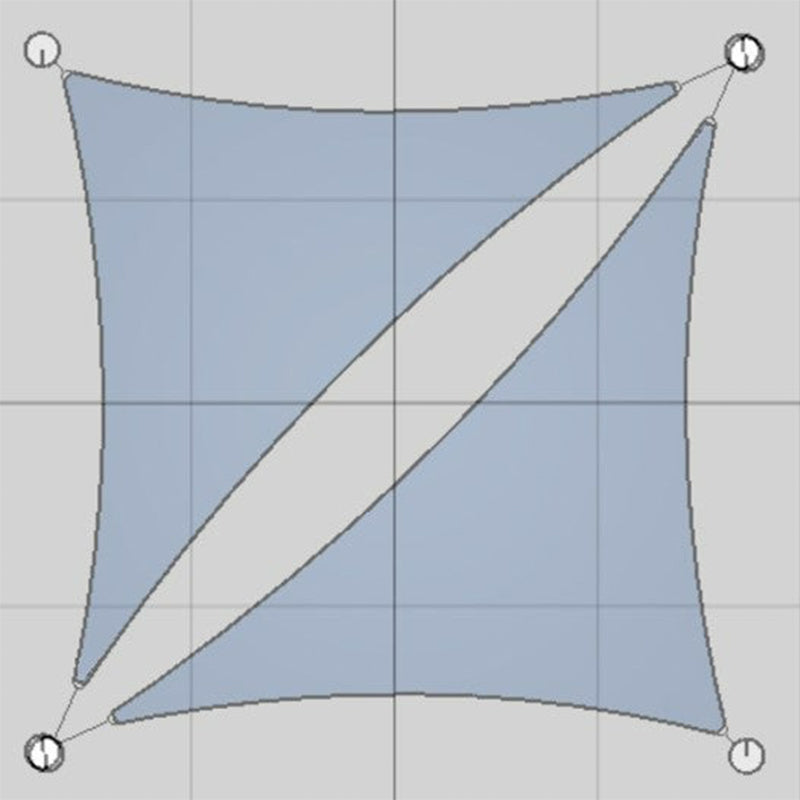
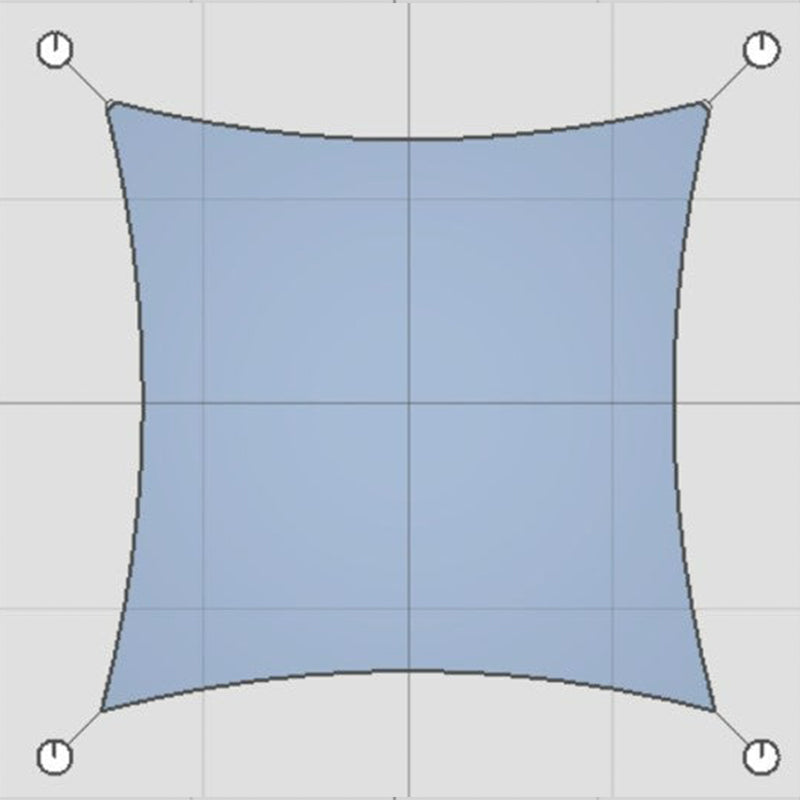
3 vs 4+ Corners
While triangles tend to look the most aesthetically pleasing, 4+ corner sails are much better at shade coverage and are typically less cost per square foot!
Watch out for the gaps that can appear when two sails are placed side by side. Here are two 10' right triangles vs. a single 10' x 10' square.
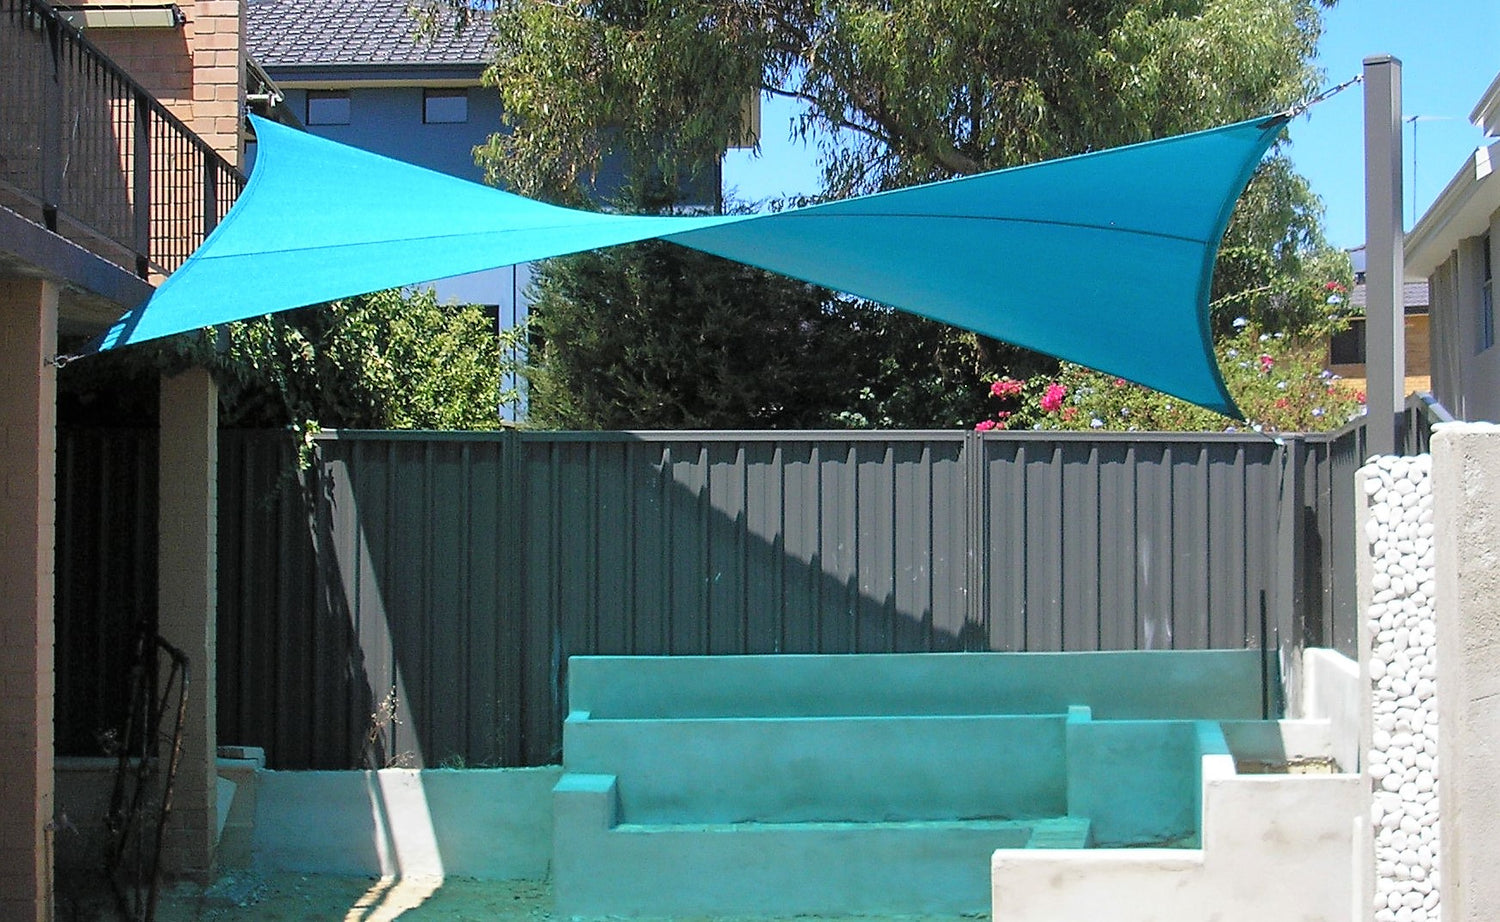
Hypar Twist
Do you like the triangle look but want more shade coverage? And a much STRONGER sail? The hypar twist design gives you both!
With opposite corners at a low height, and the other pair at a higher position, a "twist" or "saddle" shape is introduced. This locks the sail in place against wind. The 3D shape of the sail displays triangular sections while still providing solid shade coverage for the area beneath.
-
Standard Sizes - 4 Shapes
Order OnlineChoose your dimensions, color, hardware package, and immediately order your sail.
-
Custom-made to Fit Your Space
Contact us directly, we have a dedicated design team to solve all your problems!
+ 1 (888) 789-1123
customersupport@shopamgo.com
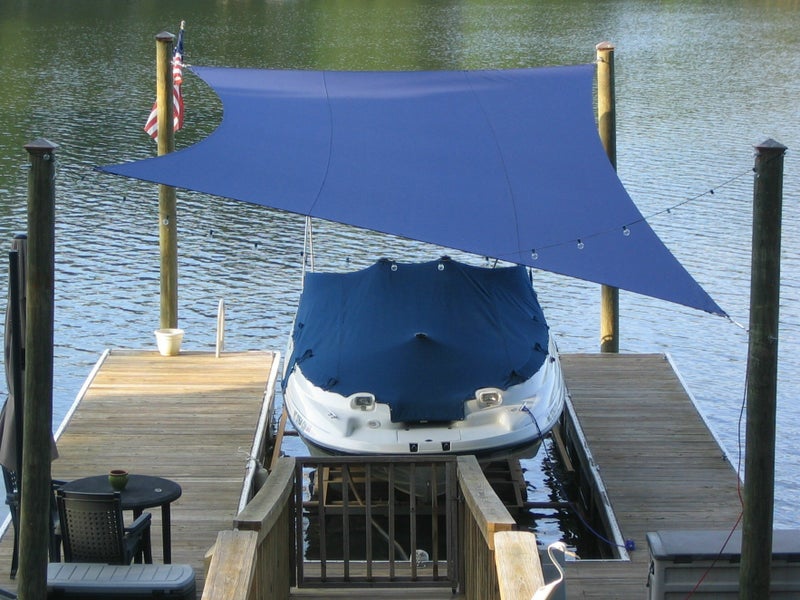
Required for Waterproof Sails
Waterproof sails REQUIRE 20%slope at minimum so that water does not pool on the sail.
This is the main limitation when it comes to sizing for waterproof sails.
Mounting Locations
Mounting points need to be able to withstand a large amount of lateral force load. If you are attaching a pad eye or eyebolt to an existing structure, check to make sure those conditions are met.
Posts should be set in concrete and buried 1/3rd in the ground. Steel is always recommended for pole material. Angling a post slightly away from the sail increases its ability to bear the lateral force. Always check for underground utilities before digging!
If you have specific questions about attaching your shade sail to your home or building, or are uncertain about the strength of potential attachment points, we suggest you contact a carpenter or handy-man that can evaluate your building or structure.
When attaching to a building, it is very important to ensure that mounting points are structurally strong. If attaching to a wooden part of a building, we generally use a diamond pad eye, pad eye, or screw eye. When attaching to a solid concrete wall, we normally epoxy a 3/8-inch eye bolt into the wall. For less common applications, such as going through a wall and using a backing plate or attaching to a roof, alternative hardware may be required.
Perimeter
TIPS
-

D Ring (Webbed-Perimeter)
Explore MoreRating: 7/10
The main sails on the market are created with either a medium or heavy webbing sewn into the hem of the sail. Best for sails with 4 corners or more, especially if they are to be taken down often.
D rings are attached to each corner for easy installation, made of 314 rust free stainless steel, bigger and stronger, corners are constructed with extra amount of stitched seams to maximize the strength of D rings.
-

Pro Ring
Explore MoreRating: 8/10
Pro ring, also known as d-ring thimbles, are generally sewn into the webbing of a shade sail, most commonly on center anchor points, to create a secure fixing point between the sail and an anchor point.
They have a floating rolled ring inside two welded thimbles. D-Rings are made from high-quality marine grade stainless steel and are specifically designed for general purpose, marine and shade sail applications and for use with seatbelt webbing. -

Super Ring (Cabled-Perimeter)
Explore MoreRating: 10/10
A second variation has cabling that runs through the perimeter pocket and acts to pull the sides outward. Cabled sails require an additional step during installation to tension and lock down the cable. Each side has a swaged end and a clamped end.
Made of 260 GSM permeable extra heavy duty fabric, heavy duty stainless mounting rings, cable wires built-in edges, integrate into the mounting rings, all pulling strength goes to the cable wires, not only making the edges more durable, it also enhence the appearance of shade sail.
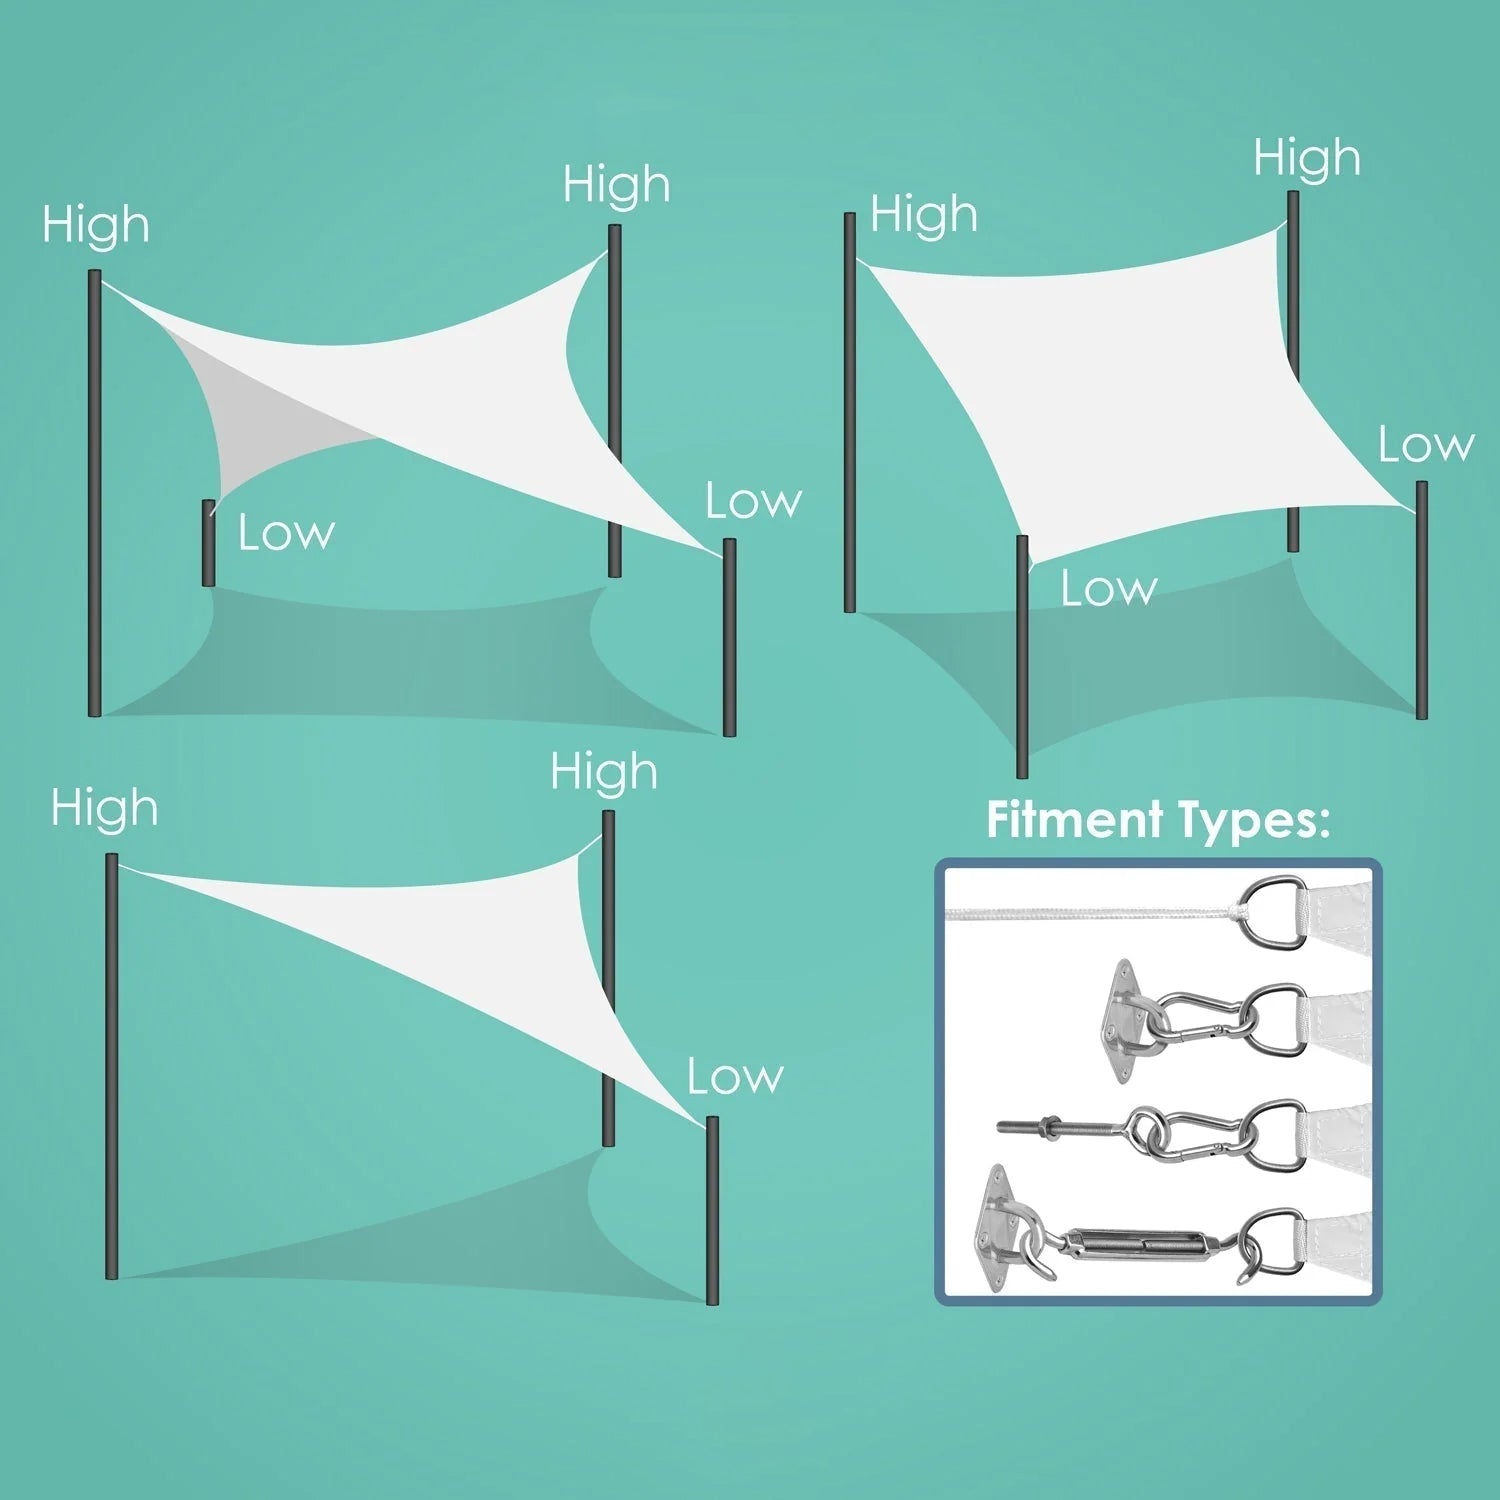
Installation Methond
Rectangle/Square/Triangle Shade Sail:
Choose two corners higher than others, water can run off more easily
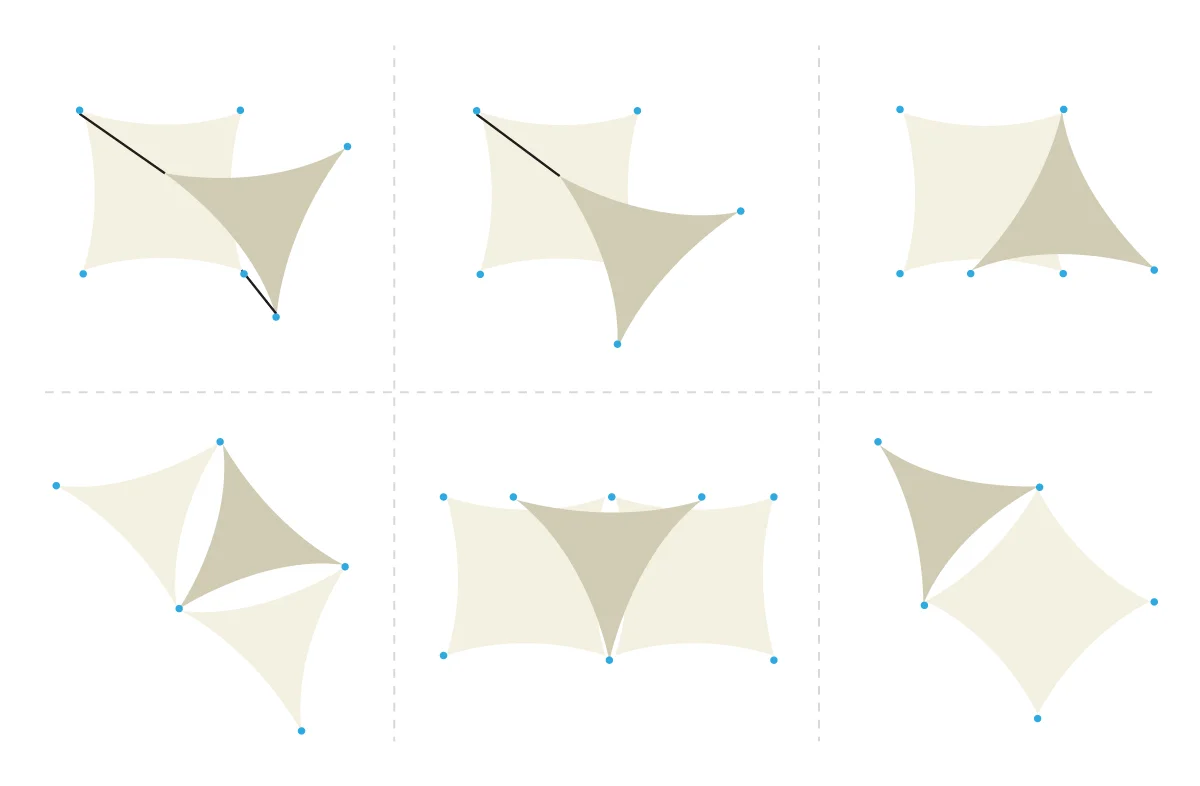
Suggested Sail Position Schematic
If you need to cover a large area and order a number of sails larger than equal to two, then you can refer to these sail positions recommended by our professional designers, these schematic diagrams take into account the aesthetics and ease of installation.
Note that when installing the sail, tilt it to prevent the sail from draining and cleaning at a later stage.
-
Standard Sizes - 4 Shapes
Order OnlineChoose your dimensions, color, hardware package, and immediately order your sail.
-
Custom-made to Fit Your Space
Contact us directly, we have a dedicated design team to solve all your problems!
+ 1 (888) 789-1123
customersupport@shopamgo.com


